Screen tour
A guided walk through the main screen. Skratch Attach runs in landscape only on every device.
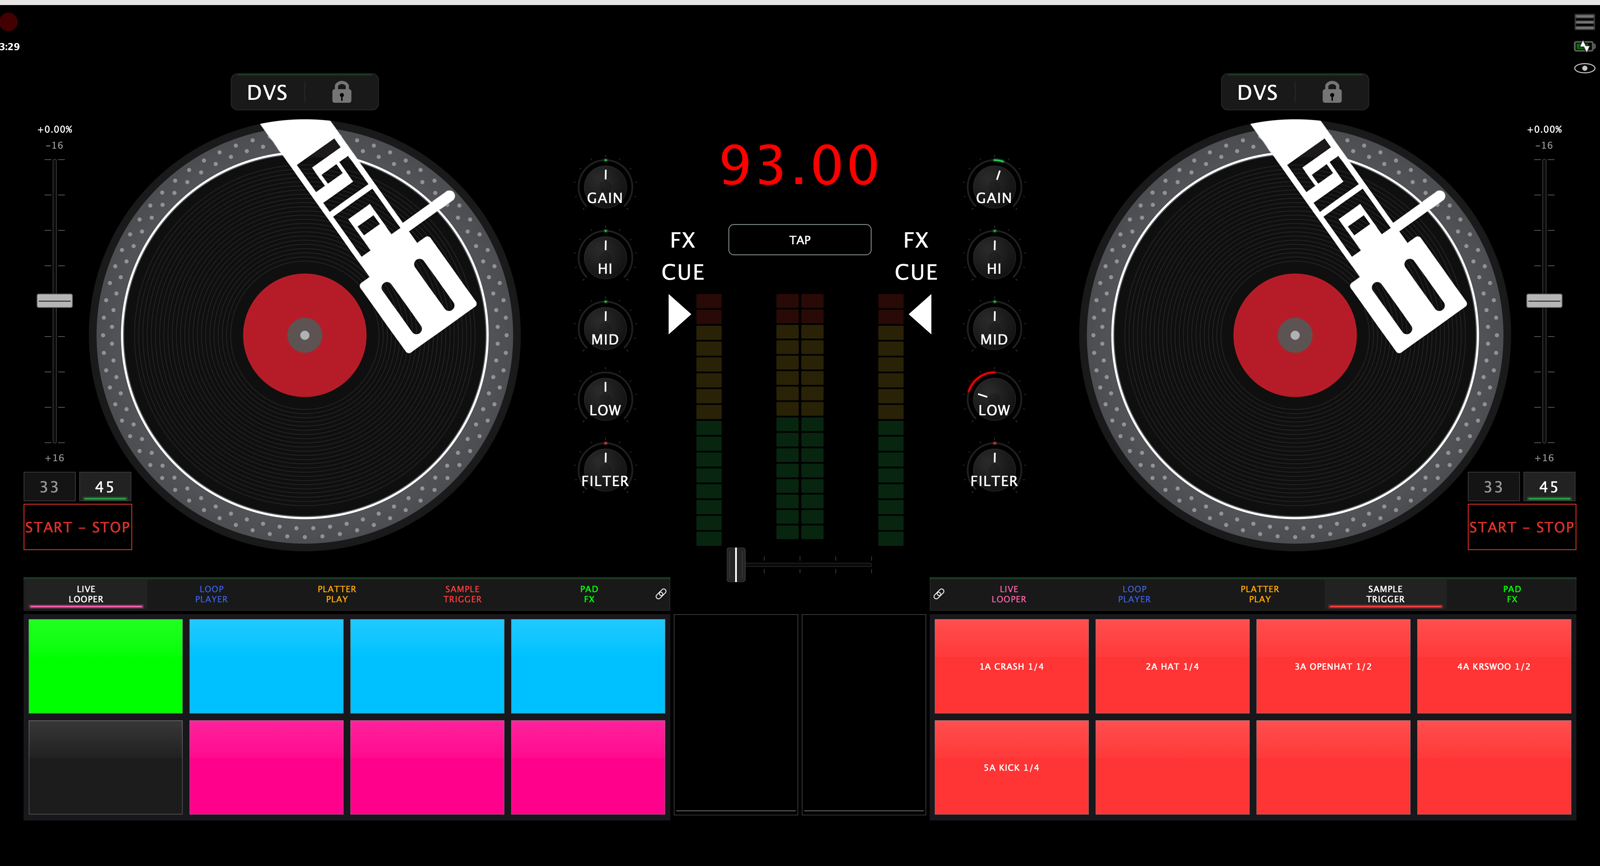
The same screen with a track loaded on deck 1 and playing — the record graphic filled in, the waveform lane flowing, the channel meter and master VU lit:
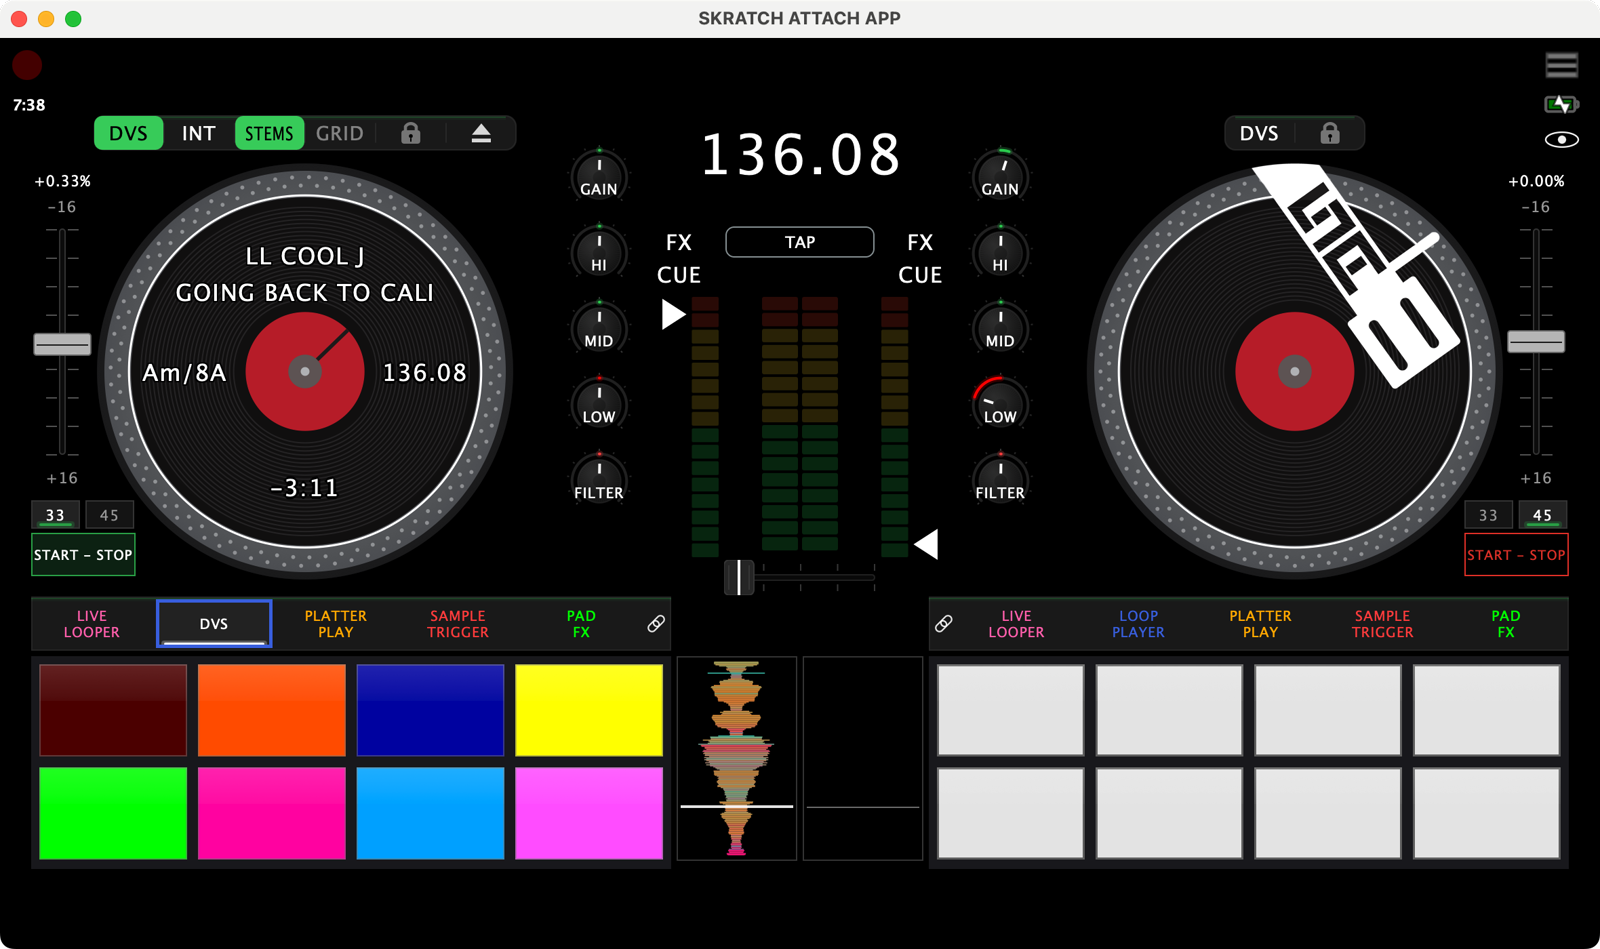
The screen is not one fixed layout — it's a view, and you can switch views with the eye in the top-right corner. This tour describes the Full view, the one that shows everything. See Views and the eye for the others.
1. Deck button bar
A short strip of chips above each platter. It only ever shows chips that apply right now, so it changes as you work:
| Chip | Means |
|---|---|
| DVS | Put this deck into DVS. Lit = the deck is in DVS |
| REL / ABS / INT / SPIN | The DVS control mode — appears only while that deck is in DVS. See DVS control modes |
| STEMS | Stem controls for the track on the deck |
| GRID | The loaded file has a beat grid / deck loop controls |
| STANDALONE | This rig is running with no DJ controller — see Standalone mode |
| lock | Key lock on/off |
| eject | Unload whatever the deck is holding |

Where did 33/45 and the pitch range go? They moved onto the turntable unit beside the platter (below). On layouts with no turntable unit the bar carries them again, along with FX and CUE.
2. The platters, and the turntable unit beside them
The record graphic carries the track information, all at one type size:
- Artist and song across the middle, wrapping to a second and third line for long names.
- Pitch % in the groove band on the fader side of the record (deck 1 at 9 o'clock, deck 2 at 3 o'clock), with the key just below it.
- BPM in the band on the opposite side.
- Track time at 6 o'clock. In Platter Play that slot hands over to the key/scale and note readout.
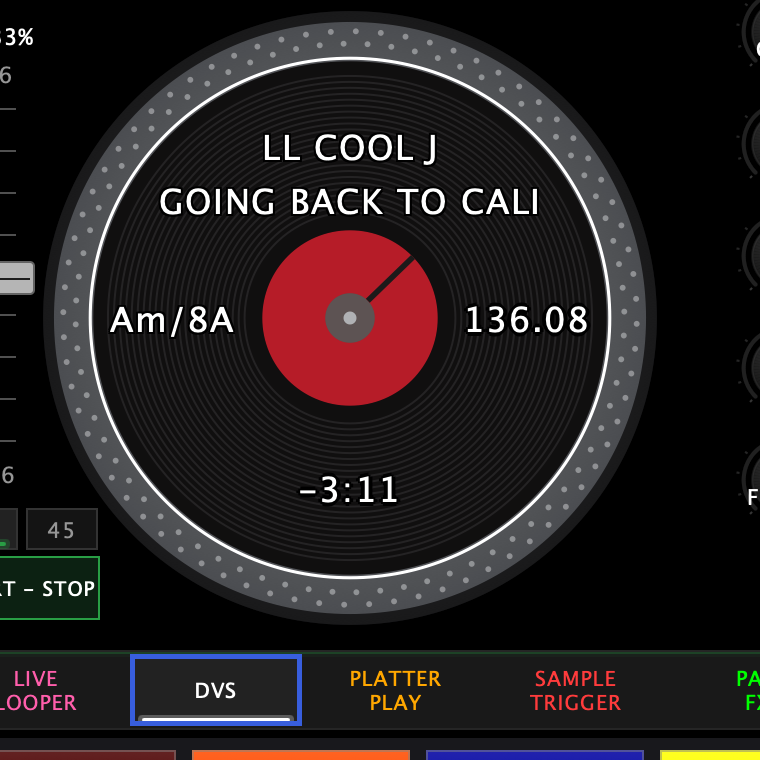
The key follows your pitch fader while key lock is off — it shows the key you are actually playing, with a small up/down triangle when you're between keys. With key lock on it shows the tagged key as it is.
Beside each platter sits the turntable unit: the pitch fader, the
33 / 45 chip and START – STOP. The fader's two end readouts show
the pitch range (-16 at the top, +16 at the bottom — slower is up, the
hardware convention) and tapping either one cycles the range.
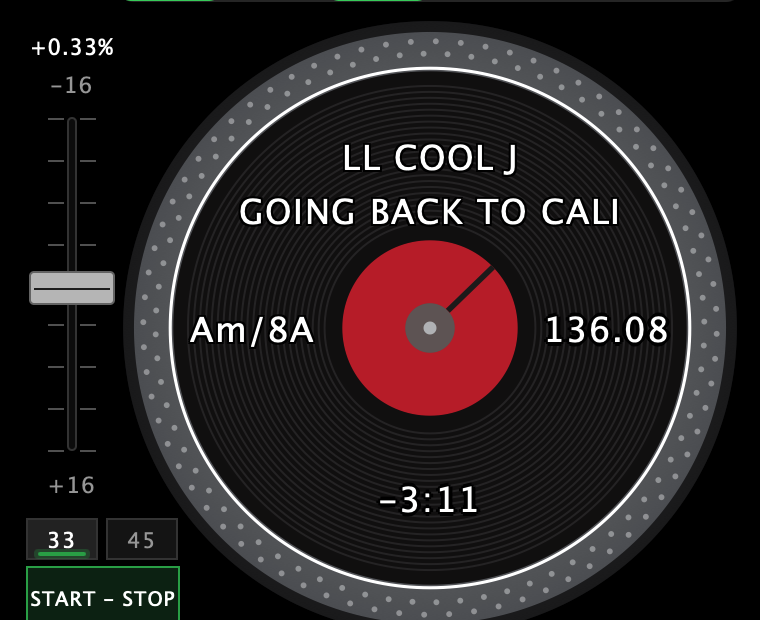
With DVS active the record disc tracks your control vinyl 1:1 — scratch the real record and the on-screen record scratches with it. The platters also respond to three hidden gestures — see Platter gestures.
3. Waveform lanes
The two black lanes in the gap between the pad grids are the waveforms — one per deck, vertical, scrolling bottom-to-top past a fixed playhead. Each lane shows about two seconds of audio, and both lanes always run on the same time scale.
What a lane draws depends on what the deck is playing:
- A loaded file (DVS / Quick Load) — the part already played sits above the playhead, and what's coming flows in from the bottom. Cue points appear as markers along the edge.
- Analog vinyl, or nothing loaded — the lane draws live from the incoming audio, so it can only show what has already played. That information doesn't exist until the needle reaches it.
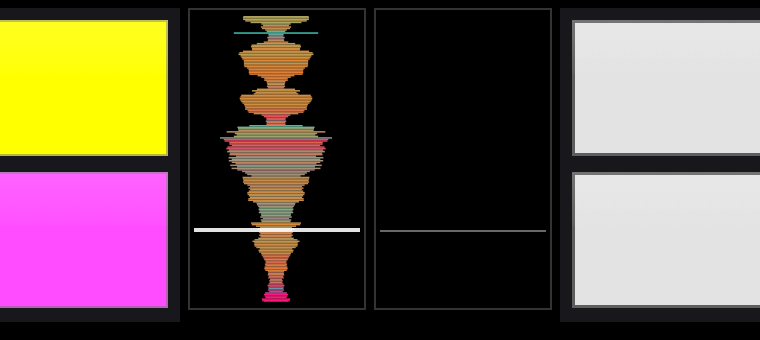
You can also drag a track from the browser onto a lane to load it on that deck, the same as dropping it on the platter.
4. Centre column (top to bottom)
- BPM display
- TAP, tucked under the BPM number
- Each deck's FX and CUE buttons, stacked beside the channel faders
- Channel faders + master VU (see below)
- Crossfader, low in the gap between the two pad mode bars
5. The faders are also your channel meters
Each channel fader's track doubles as a live level meter for that channel; the fader position is the small triangle beside the ladder. The level shown is pre-fader (but post-gain), so it keeps reading with the fader all the way down — that's intentional, so you can gauge a record's level while you cue it.
The meter between the two faders is the master VU — a separate readout of your main output.
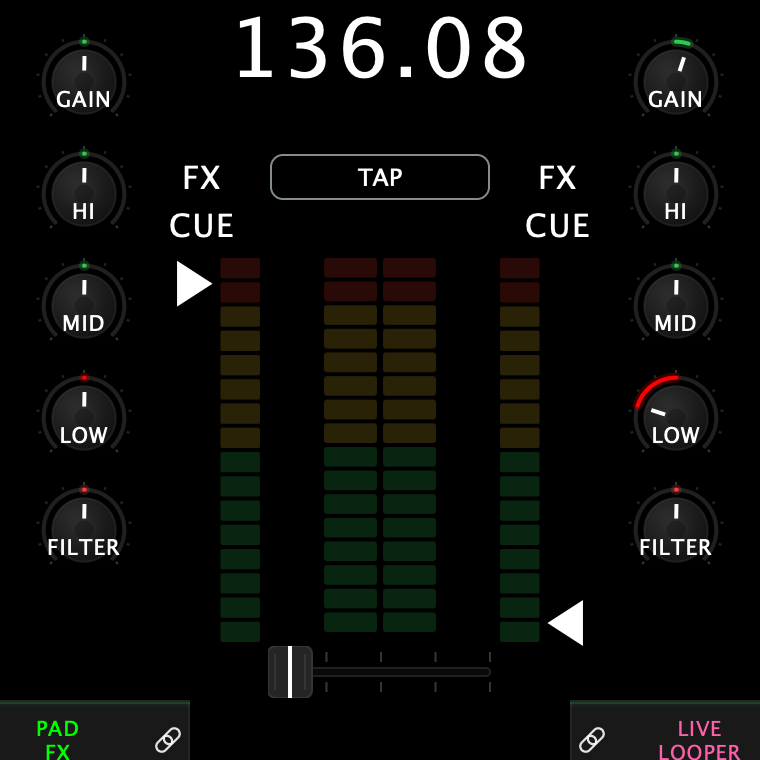
The on-screen meters read true peak and go red at −5.5 dBFS — slightly earlier than clipping, like a hardware meter. They are deliberately on a different scale than the LED ladders on the hardware itself, so don't expect them to match segment-for-segment.
6. Pad mode bar
One bar per deck selects the pad mode. On screen the five read LIVE LOOPER · LOOP PLAYER · PLATTER PLAY · SAMPLE TRIGGER · PAD FX — the Sampler mode is labelled SAMPLE TRIGGER here, and the Rane One's own printed names differ again (see the decoder ring in Pad modes overview).
Each name carries its own colour, and the active mode is underlined in that colour. Re-tapping the active mode switches to its secondary — Loop Player's second press opens DVS, and the button relabels itself to match.
At the end of each bar is a small chain icon. That's the link between the on-screen pads and the hardware pads — see Pad modes overview.
You can hide the bar in Settings → Customize → Hide Mode Bar.

7. Top-right corner
The hamburger menu (settings), the battery indicator, and the eye that cycles your performance views. (The clock is in the top-left corner, under the record dot.)
Settings open as a full-screen overlay with a sidebar down the left: Audio · Contours · Customize · MIDI · FX · Stems · Presets · Devices · Pad Modes. Click a row to switch page; the X closes.
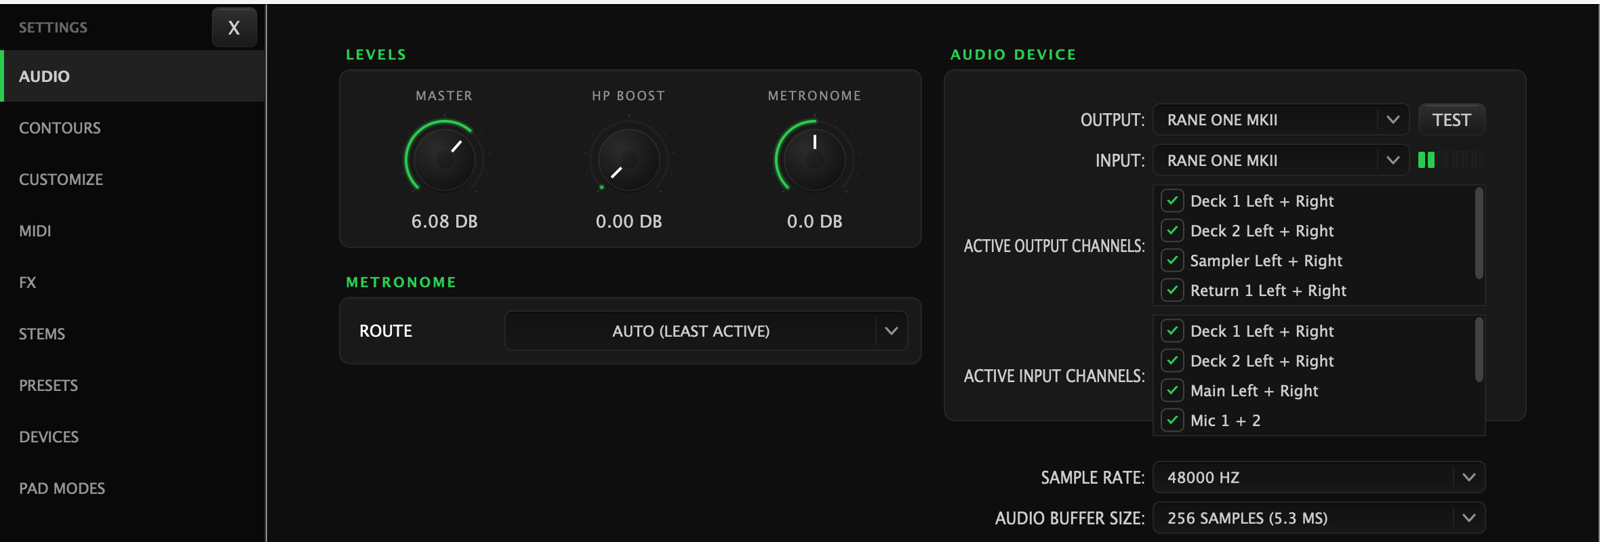
Two things worth knowing about that list:
- Devices (the setup wizard) is desktop only — the row doesn't exist on iOS.
- DVS settings are not a sidebar row; they're the seventh sub-page inside Pad Modes.