Pad modes overview
Skratch Attach has five primary pad modes per deck, each with a secondary mode behind it. You can switch modes from the hardware mode buttons or the on-screen pad mode bar — and the two don't have to match (see below).
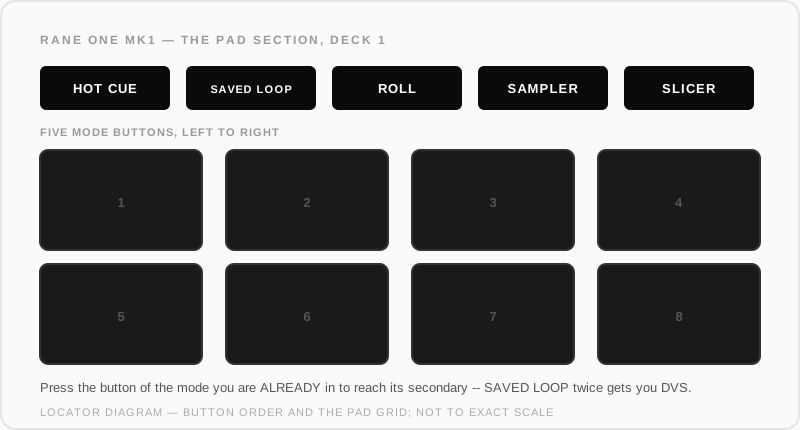
The five modes — and what the buttons say
Important: the mode names printed on the Rane One come from its Serato heritage and are not the Skratch Attach mode names. This table is the decoder ring:
| Skratch Attach mode | Rane One button says | What it does |
|---|---|---|
| Live Looper | HOT CUE (1st button) | Record loops from the decks in real time — full guide |
| Loop Player | SAVED LOOP (2nd button) | Play loop files from disk, tempo-matched, 8 pads × 4 banks |
| Platter Play | ROLL (3rd button) | Melodic scratching — pads play musical notes by driving the platter motor |
| Sampler | SAMPLER (4th button) | One-shot samples, 8 pads × 4 banks, capture & CHOP |
| Pad FX | SLICER (5th button) | Per-pad performance effects: brake, backspin, echo, stutter and more |
Everywhere else in these docs we use the Skratch Attach name, with the printed label alongside when you need to find the physical button.
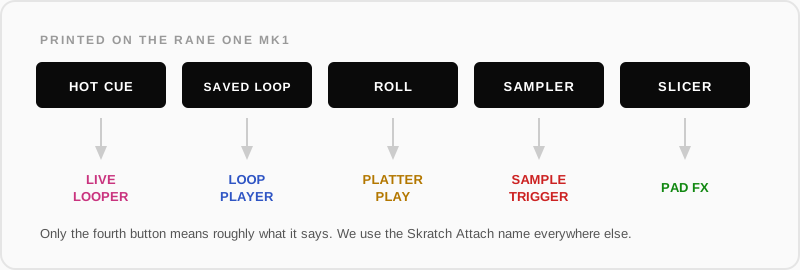
On screen the same five modes read LIVE LOOPER, LOOP PLAYER, PLATTER PLAY, SAMPLE TRIGGER and PAD FX, each in its own colour, with the active one underlined and the chain icon at the end of the bar:

Secondary modes: press the mode button again
Pressing the mode button of the currently active mode switches to its secondary mode:
| Primary | Press again for |
|---|---|
| Live Looper | User Mode |
| Loop Player | DVS — control vinyl drives the audio (bank 1 scratch sounds, bank 2 songs) |
| Platter Play | User Mode |
| Sampler | Frequency Isolator — Acapella / Melody / Bass / Drums isolation. The bar calls it Frequency Isolator; the feature page is Stems |
| Pad FX | User Mode |
The on-screen pad mode bar shows the secondary steadily, as a relabelled button outlined in the primary mode's colour — the secondary sits visibly "inside" its primary.

The chain icon: linked, or independent
At the end of each pad mode bar is a small chain icon. It decides whether the on-screen pads and the hardware pads are the same instrument:
- Linked (the default) — the bar mirrors and drives the hardware. Tap a mode on screen and the hardware pads change with it, exactly as if you'd pressed the physical mode button.
- Unlinked — the on-screen pads run their own mode. Your hardware pads keep whatever they were doing, and the bar's active button is marked as the on-screen mode. So you can keep scratching with DVS on the hardware while recording loops with the on-screen Live Looper pads.

Tap the chain to switch between the two. Re-linking puts the on-screen pads back on the hardware's current mode.
On a rig with a CRSS12 attached, the chain splits all three surfaces: unlinking also detaches the CRSS12 onto its own independent mode, and re-linking returns it to mirroring.
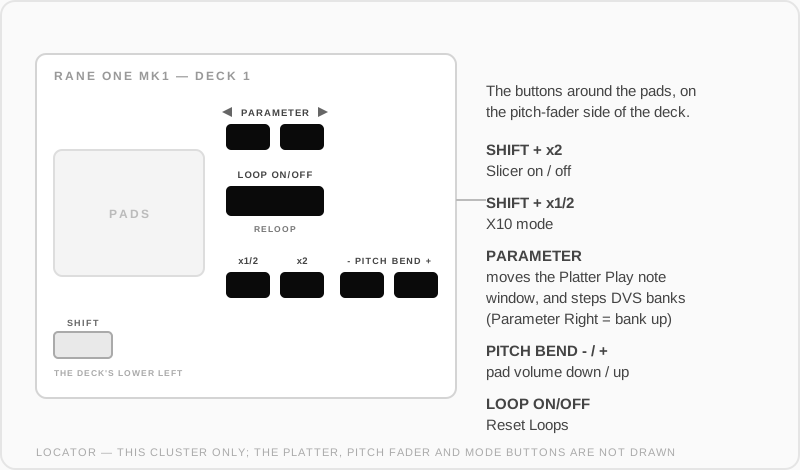
The buttons around the pads
The small buttons beside the pads do app jobs that the printed legends do not tell you about:
Long-press a mode button to load a folder
Long-press LOOP PLAYER or SAMPLE TRIGGER on the bar and the loop or sample browser opens with one row pinned at the top: LOAD THIS FOLDER TO 8 PADS. Navigate to the folder you want, hit that row, and its files fill all 8 pads of the current bank. It's the same action as shift + the hardware mode button.
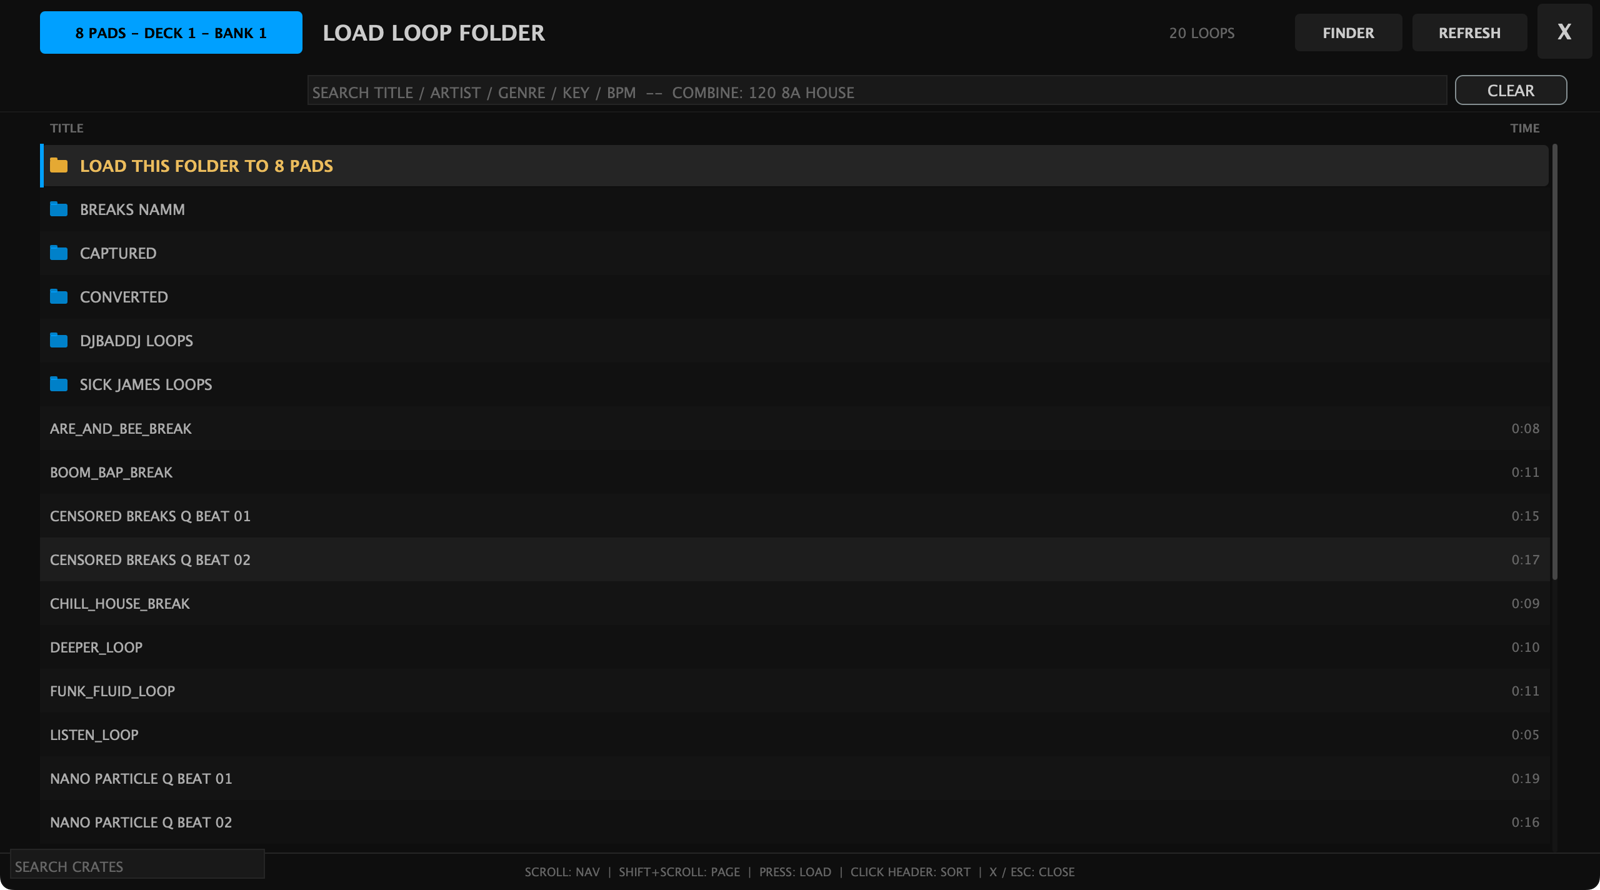
Holding a pad while you long-press the mode button opens that one pad's browser instead of the folder one — the way in on an iPad, where there's no SHIFT button and no keyboard.
Shift + on-screen pad shortcuts
| Mode | Shift + pad does |
|---|---|
| Live Looper | Clear that pad's loop |
| Loop Player | Hold to open the loop browser for that pad |
| Sampler | Hold to open the sample browser for that pad |